Over the years I’ve become a fan of the trackpad, especially since the introduction multitouch and gestures. The problem is that I mainly use an iMac, and there are very few, if any, options for a USB trackpad that works as well on a Mac as the built in trackpad works. In scrounging the interwebbernets for the mythical USB multitouch trackpad, I came across a few references to using a MacBook’s trackpad since it is USB based. This went by the wayside for a while, then recently I stumbled upon a post that went in to some detail of modding a trackpad for use as a USB device, and after seeing that I could buy the MacBook Pro’s trackpad case part on eBay for $30, I figured I’d give it a go.
Following are the photos of the process and some commentary.
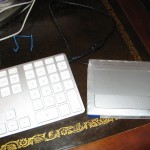
- USB trackpad sitting in it's new home.
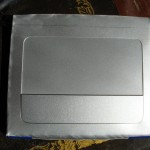
- The back of the finished USB trackpad. Taped and extra taped, but never got back to soldering cable to leads.
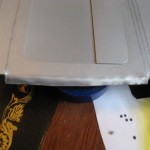
- All folds finished using several pairs of pliers.
- First fold. Bent the trackpad's frame. Button now wonky. 🙁
- Used tip snips to cut it. Had to be very careful not to bend the trackpad's frame.
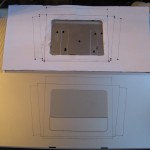
- Change in design due to late night inspiration (less cutting and folding).
- Design transposed to case.
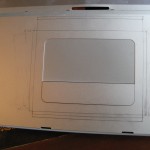
- Initial design for cutting/folding case.
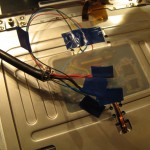
- For testing, I twisted and taped the soldered wires to the USB cord. I guessed correctly the first time!
- Taped and recovered.
- Close up of finished soldering.
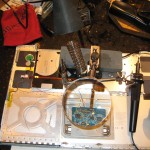
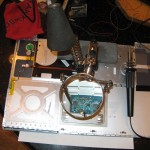
- Mad scientist setup with soldering done.
- Because the test points to solder to were so small I had to but a magnifying glass on a stand.
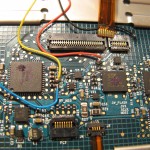
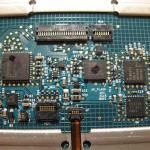
- Close up of controller board. The light green grid is at 1mm!
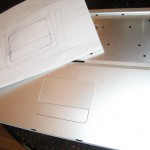
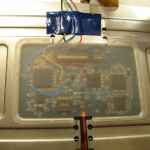
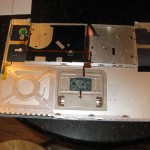
- Backside of case showing controller board.
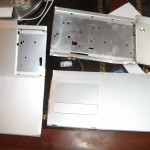
- MacBook Pro 17" case with trackpad from eBay
Soldering the lead wires:
Looking at the small ribbon connecting to the controller board, I noticed that it only had four leads. Since this is how many wires are in a USB cable, I made some assumptions about which leads were associated to which USB functions, namely that the left one that connected to ground, the right one to power, and the other two were the data cables. Since there was no way that I could solder to the leads themselves since they were so small, I needed to find which test points (the gold spots on the board) connected to which lead. I used a combination of tracing the circuit board and guessing to find the match, then used a digital multimeter to verify my guess. Once found them all, it was time to solder. Since I did not know for sure which of these leads connected to which USB function, I decided to solder lead wires instead of directly to the USB cable. I prepped some multi-colored wire and fired up the soldering iron. I was using an iron with a small tip, but even smaller would have been better. I have seen reference to a “needle tip” which probably would have been just right. I melted the solder onto the lead wire, then used the iron to melt that on to the board. Several times I had to unsolder a wire because it was touching multiple test points. Suffice it to say that it was a nerve racking ordeal. Next, I twisted and taped the lead wires to the USB cable’s wires, having to guess which data wire went to which lead. Luckily enough, I guessed correctly the first time, because when I plugged it in to my keyboard, it just work. It shows up in System Profiler as “Apple Internal Keyboard / Trackpad” and I can use the default trackpad preference pane to set the gesture functionality I want.
Cutting and folding the case:
To get this to a usable state, I knew that I’d have to cut the case down to size. My plan was to use tin snips and a sheet metal bender to form the metal in to a nice little case (photos 9 and 10, and redesign at 11), but I quickly ran into problems. When cutting, the tin snips were curling the metal, so I had to cut at an angle so that the excess case got curled, and not the track pad itself. After a few tests, I was able to get this down, and snipped out the trackpad with little damage. I wish I could say the same for folding the edges. The sheet metal bender was too large and I had no way to keep the rest of the trackpad from flexing when trying to bend it. I reverted to slowly bending bit by bit with pliers, but in the end, I bent the trackpad enough that the button only works when pushed firmly in the center.
Conclusion:
I’ve now been using my trackpad for several days now instead of a mouse, am still getting use to it, but I think it’s going to stick. I wish that I could customize what the gestures do, but for now will have to be satisfied with having them at all. If you are considering making one of these, my number one suggestion is that unless you know what you are doing, DO NOT FOLD. Cut the case and use a Dremel or something to smooth the edges, and use something else, even metal from the excess case, to support it. This is my only regret since the button is not wonky. My second suggestion is get a small soldering iron tip, it will just make life that much easier.



Can this be done with the current trackpads.
I haven’t personally seen the unibody MacBook torn-down, so I honestly don’t know.
i have a macbook (white 13inch mid2007) and an extra top case whith a working trackpad.
the controller board are not exactly the same, so i can’t use the same test point as you did.
how can i find witch one are the usb connector?
do i have to connect it to my macbook and then use a multimeter to find witch one have are positive or negative?
Successfully made one as well! As simple as explained, thanks a bunch Justin, this is genius:
http://preview.tinyurl.com/externaltrackpad
@boblebob check out the link from the first paragraph, the pinouts are different and are indeed the ones I could use on my model.
@Justin do you have any good Windows driver to enable features such as 2 fingers scrolling? am still seeking…
can’t by any of those old-style trackpads on ebay on cheapo. only with the palmrest for the whole $150! i’ve always wanted to have the one when I am using my macbook with external display and keyboard. Besides, it’s one of the reasons I don’t want to upgrade to unibody 🙂
if i connect the touch pad like this do you connect the internal hub ? (would the keyboard work?)
I had it connected to the keyboard’s USB mainly because I would occasionally need to unplug it to reset it.
yeah but i mean the macbook pro keyboard if you left it connected
I have a unibody 2009 MacBook Pro. It appears the control board is built into the connector which has many pins. I’m assuming this is not USB based so this mod would not be possible? 🙁